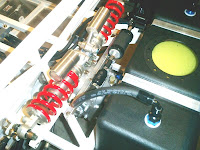
While the wife and kids are enjoying an extended stay with the inlaws, I'm plugging away on the car.
Fuel tank, filters, pump and lines are mounted, Just need to add some foam to the fuel tank mounting straps (on order). The 8mm bike quick connect fittings seem to match the 5/16" fuel filter fittings and banjo fitting on the fuel pump (5/16" = 0.3125" = 7.9375mm). I'll cross my fingers when I pressurize the fuel system and hope for no leaks.

Differential and driveshaft are installed/mounted/torqued with locktite, lock washers, lock nuts where possible. I marked the bolt heads to make it easy to detect loosening. Note to self, make checklist of critical fasteners...

The tunnel should give me adequate protection in the case of a driveshaft failure, but I'm thinking to add a hoop or two just in case, to minimize potential travel and therefore damage to the tunnel...oh yeah, and my legs...
And I started running brake lines. I decided to use standard fittings all the way to the flex lines. My initial plan of using adapters got me worried as I started running the lines and ended up stripping the threads on one of the adapters.

Building an R1 Powered Seven
A few years ago I got it in my head to build a kit car. After months of searching I came across the Locost concept. In short, quite a few amateur hobbiests around the world have built their own Lotus 7 inspired cars from scratch, following plans available on a variety of Internet sites and published in a book by Ron Champion.
I started gathering parts and finally began building the chassis in July '05. In August '10 the car was titled, licensed and is now street legal. The following blog captures the progress of the build and driving experiences after completion.
Links
Blog Posts
Monday, August 18, 2008
Fuel, Driveshaft, Brakes
Posted by
r1.se7en
at
7:01 PM
![]()
Friday, August 1, 2008
Driveshaft Adaptor
Installing the drive shaft adaptor was a little more involved than I was expecting (a common occurrence as I progress though the build)
In order to get the proper engagement of the splines, I needed to machine about 0.080" off of the spacer that the bike sprocket bolts up to.
Instructions from Hawk http://www.hawkmachine.com/Parts.htm#20 :
Removing the spacer took some persistance, and help from a nice set of gear pullers borrowed from work. Here's a picture after the spacer was shortened and re-installed. There's 0.580" of spline length exposed, just over the minimum recommended.
The next challenge was installing the adaptor itself. I bought a 36mm socket to fit the sprocket nut, only to find that it didn't fit inside the adaptor....nothing a little, I should say a lot, of grinding couldn't solve...
Adaptor finally installed and ready for driveshaft.
Posted by
r1.se7en
at
7:13 PM
![]()


